

Courtyard Clean Up!


How lovely is this weather? It has been an absolute dream working in the garden this past month.
With the long evenings, I have completed so many garden projects which I can't wait to share with you. This first being this simple wooden bench that I made from an old gate!
Our courtyard was an eyesore and I am delighted that I finally have had the time to do a Dream DIY up-cycle on it!
To create this courtyard look I started off by giving the ground a good power-wash. I advise putting down some bleach first or a patio cleaner as it helps break up the grime!
I had to remove the old window as it was rotten and take down the roof of the garage. We will be replacing this in the coming months so I thought I would make a start on it.
The existing flower bed never worked in this courtyard as there was no drainage system, so I decided to turn it into a little wooden bench. (Eventually, we will be knocking this wall, so in the meantime, this is just a little fixer-upper job lol)
Believe it or not, as I said above I used wooden planks from two old gates that were lying in our coal house to create this bench, they have been there for years so I thought it was about time I made them into something new!
The bench was very simple to make. Here's how I did it:
Firstly I used the old beams from the garage, as the old saying goes "waste not, want not" to make the bench frame.
Next, we took apart the gate and then cut the planks so that they would fit across the frame. I also cut some old floorboards as I didn't have enough planks.


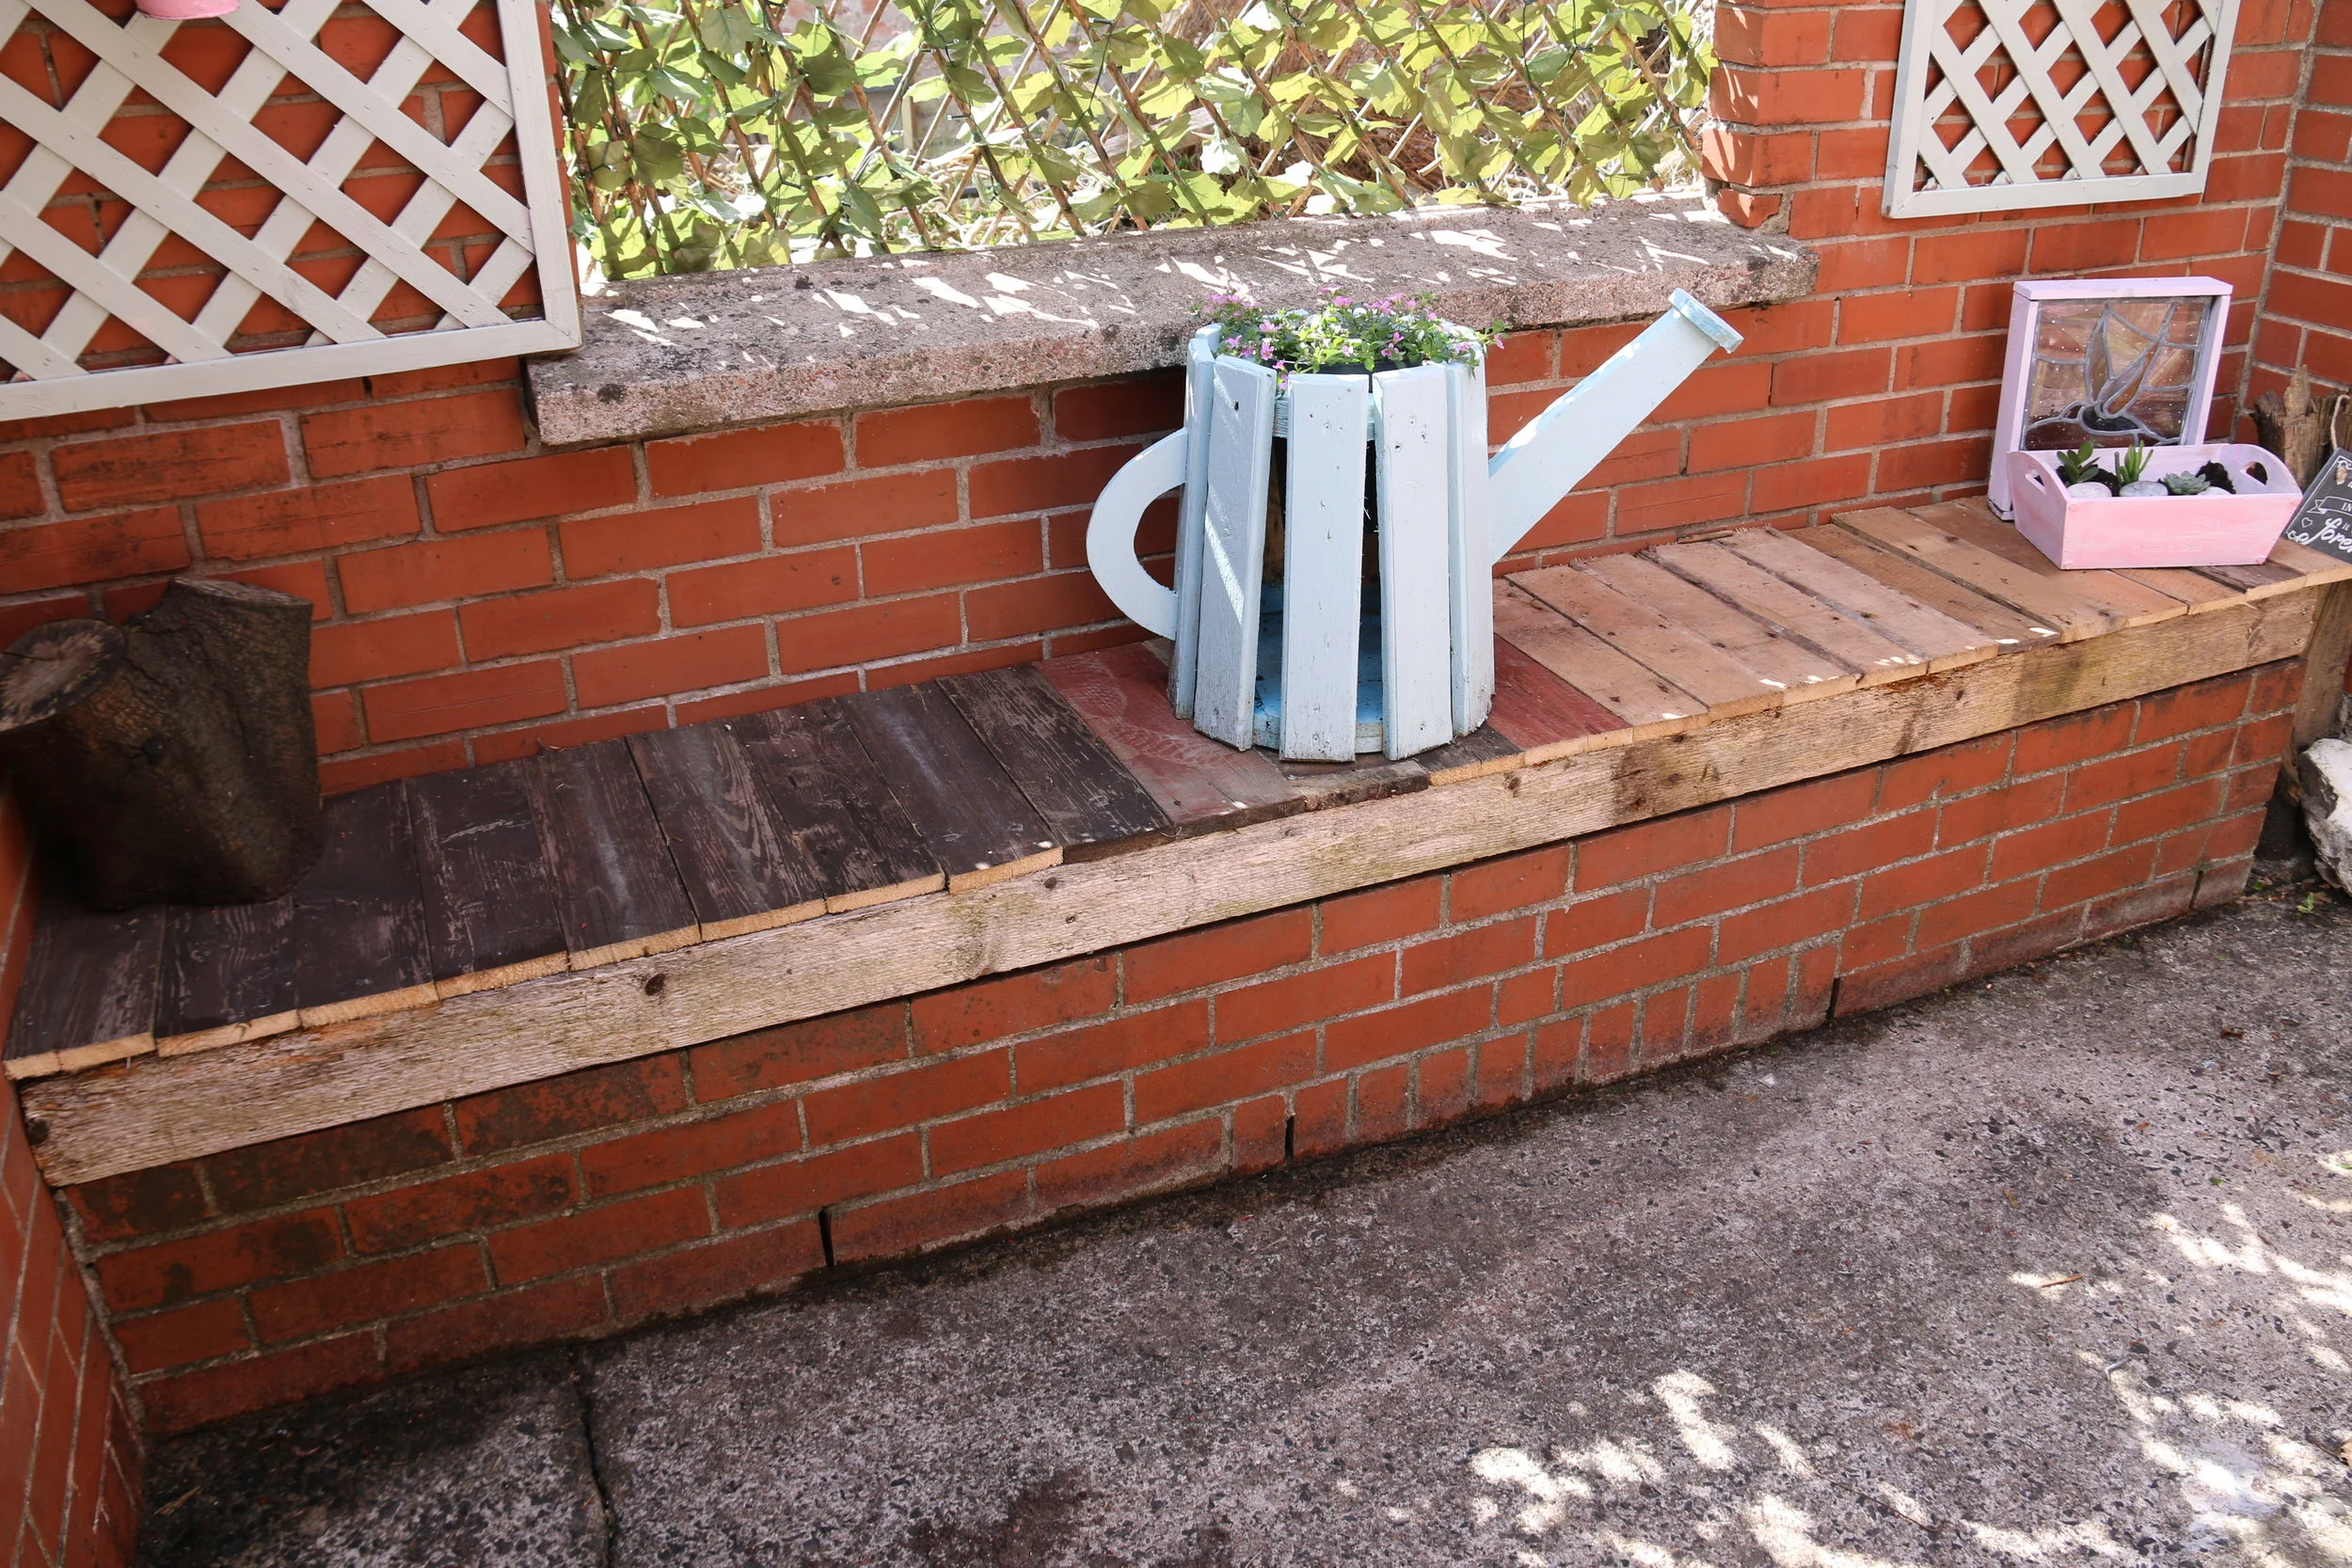
Once I had all the planks cut I hammered them onto the frame. I don't know if I will paint the bench yet as at the moment I kind of like the aged wood look. What do you think?
Onto the window! This is where the fun began. I bought a garden trellis which was covered in faux ivy from Tesco £30 ( In my opinion this was a little expensive but I couldn't find a cheaper one). I then wrapped some solar fairy light around the frame and placed it into the empty hole where the window used to be. To put my little Dream DIY stamp on it I introduced a gold frame that I have had for years, in fact, to be honest, I have been dying to use it and I'm delighted today is the day lol! I suspended the frame from the wooden beam with some natural cord.
Next, I bought some solar lightbulbs from B&M .

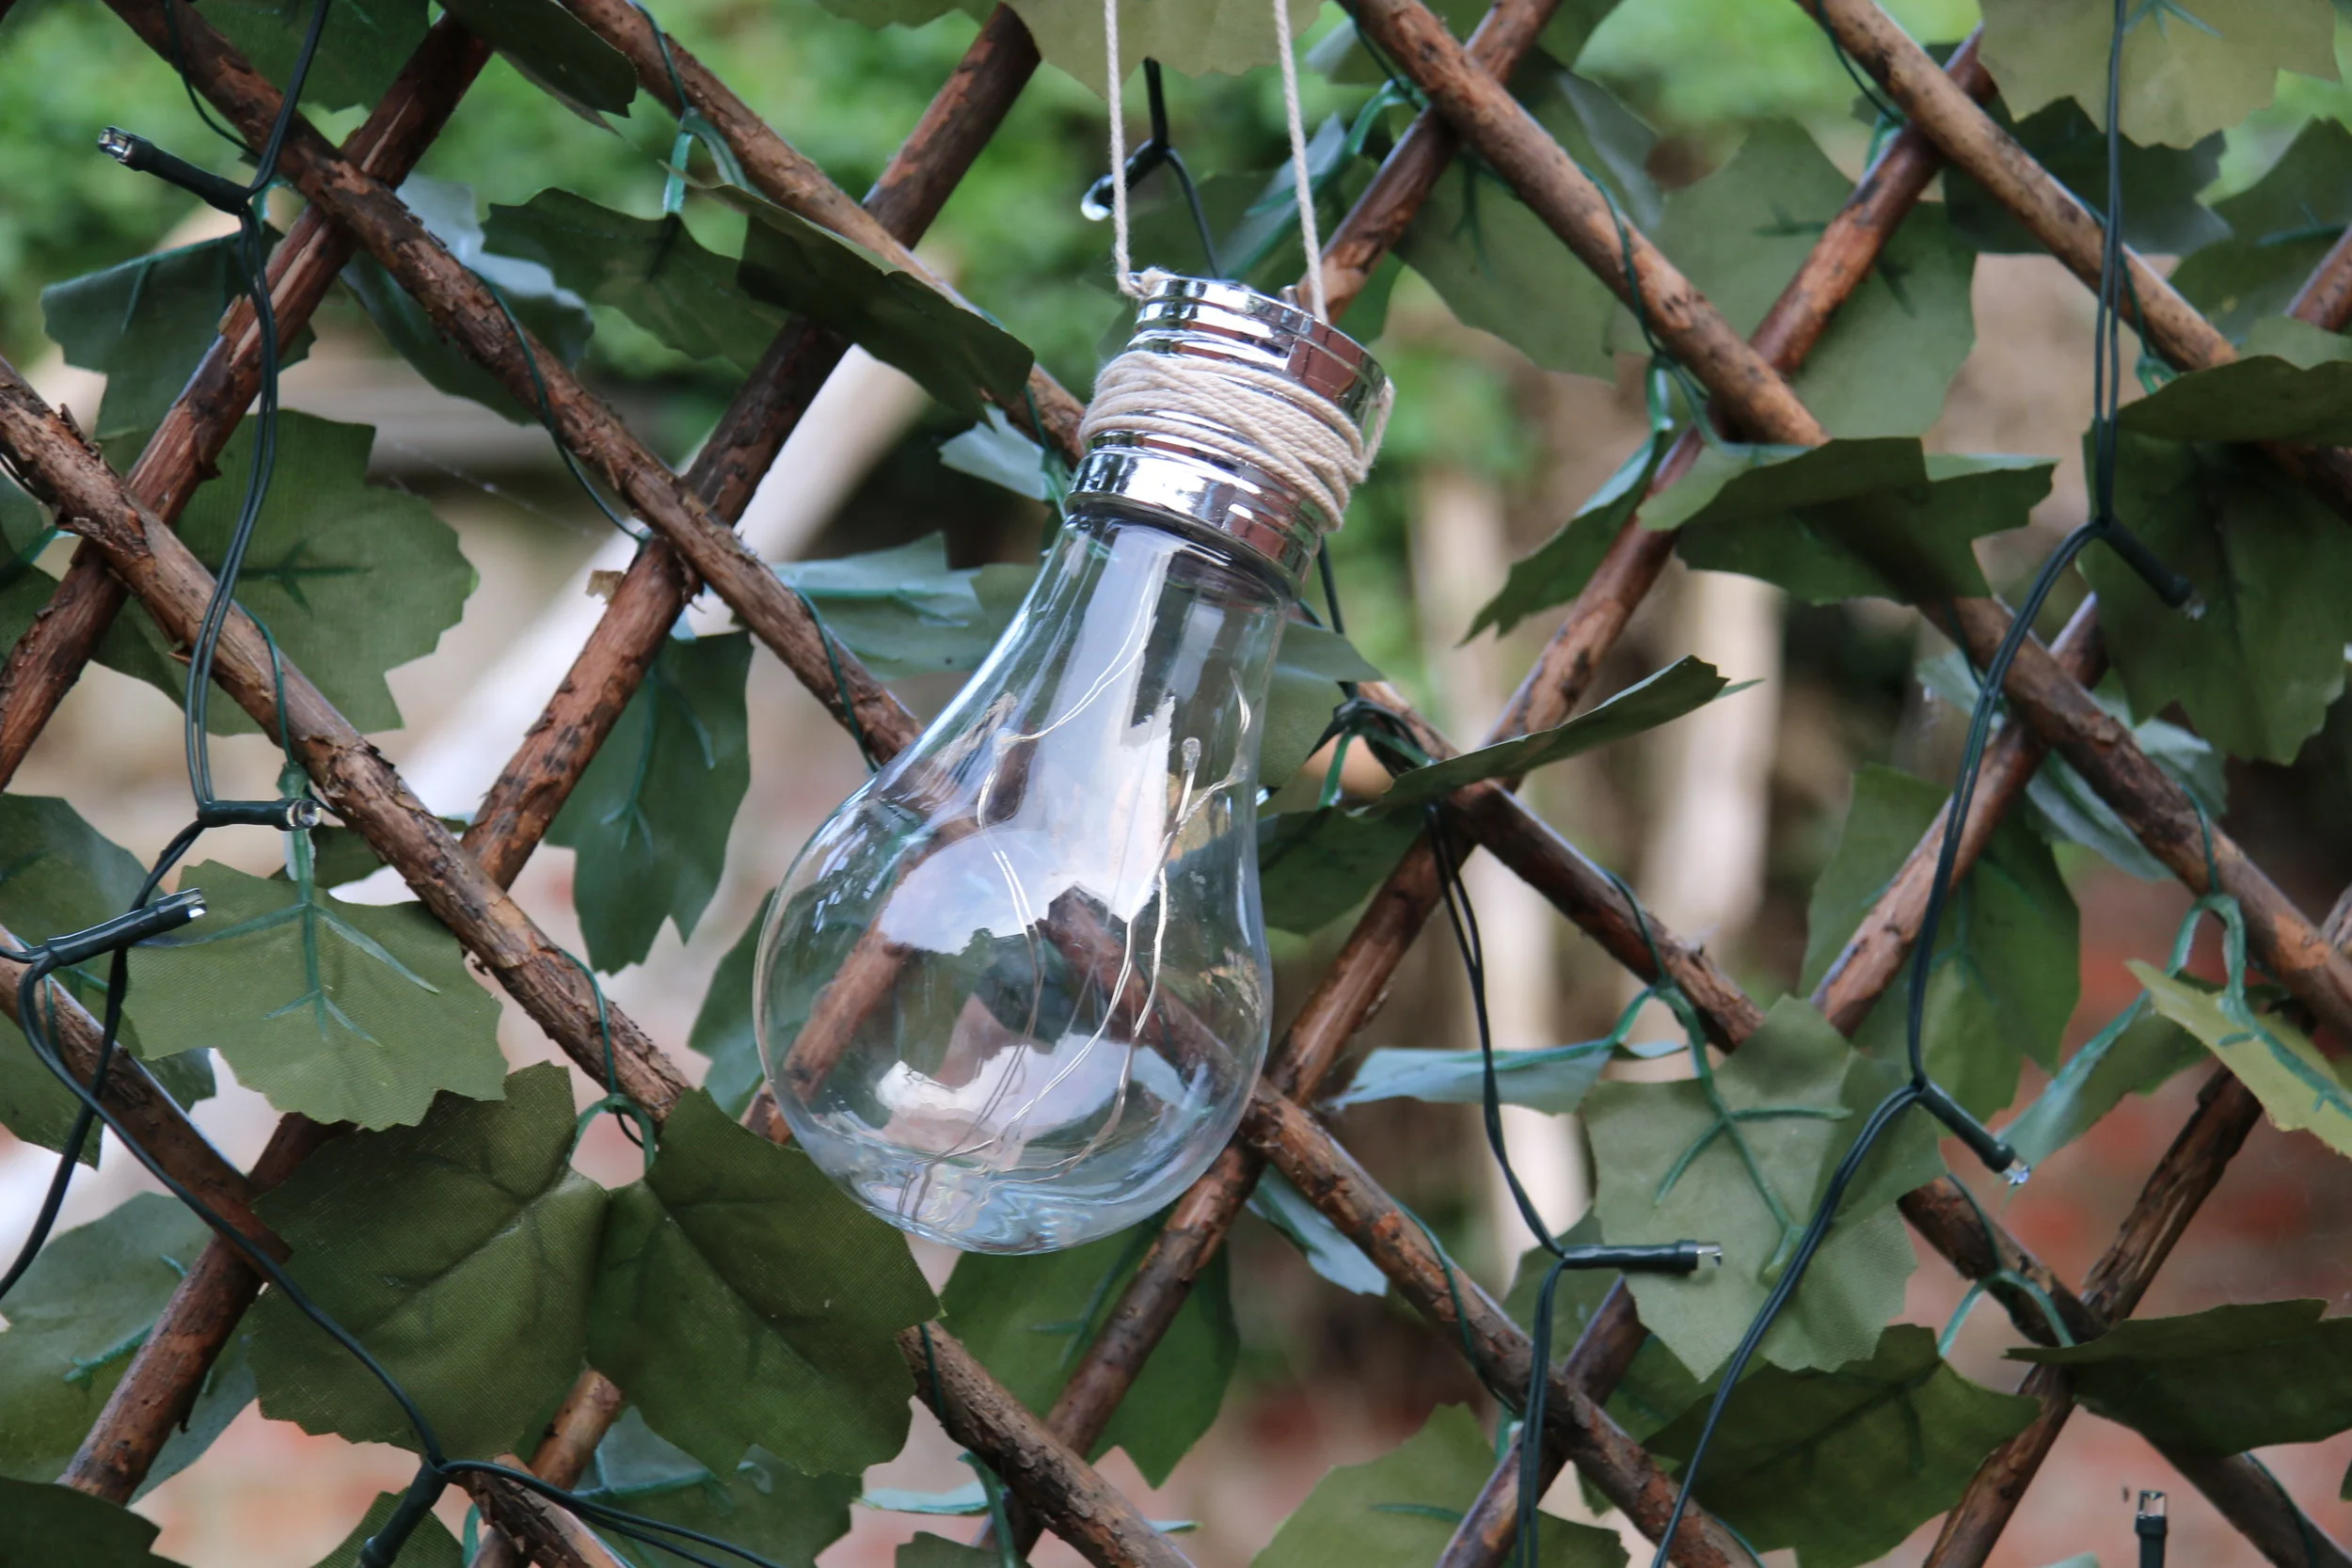


Again using the cord again I wrapped it around the bulb and then tied them individually to the beam. I have to say this looks so magical at night! To finish off my window display I added some pretty material roses from the new Range store in Portadown and tied them onto the ivy.

On the top of the bench I added my pallet watering can which I got from AMH New Horizons which is a men's shed type organisation for people that suffer from mental health. They are based at Tannaghmore Gardens and their work is amazing! I love this watering can so much that I bought a pink one too!
In the next week or so I hope to add some plants to the top of the beam and let them grow down to fill the gap.

Lastly, I added my first three succulent plants. They are my new obsession and I can't wait to buy some more!
Did you know?
In botany, succulent plants, also known as succulents, are plants that have some parts that are more than normally thickened and fleshy, usually to retain water in arid climates or soil conditions. The word "succulent" comes from the Latin word sucus, meaning juice, or sap!
The bird in the frame was given to me by my Granda Patsy. The bird used to be in his bay window and when he got it replaced he wanted me to have it because when apparently when I was a little girl, I was fascinated by the stained glass pattern! I must have always had an eye for DIY!
And that's how I cleaned up our courtyard using an old gate and gold frame! I think it looks pretty, how about you? Have you upcycled your garden or courtyard? Let me know as I would love to see what you have created!
Aislinn xx
#dreamdiy #gardenmakeover #courtyard #wateringcan #planks #upcycle #new #old #ivy #fairylights